Archive:Basic Tools
It is worth mentioning now that your choice of tools should be primarily one of comfort and not cost. You can have the most expensive, top brand maul, but if you are more comfortable using a cheap wooden mallet then the chances are that it is with the cheap mallet that you’ll produce your best work. It may sound like a load of hippy nonsense, but it is the simple truth that when working with a natural medium, be it leather, wood, whatever, the quality of your work will be very much reflective of the ‘feel’ you have with the medium you are using. Such sensitivity is greatly enhanced by familiar and comfortable tools. That said, there are times when the quality of your tools will help and they will often tend to be easier to use.
Swivel Knives
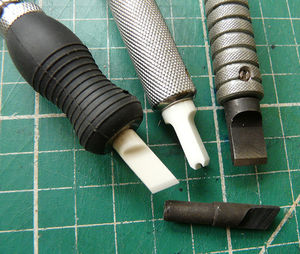
Unique to leather tooling, a swivel knife is essential. It comes in two parts, the main barrel of the knife itself and an interchangeable blade.
The barrel is definitely a matter for comfort as its action is quite unlike anything you’ve probably ever used before. The two main areas for consideration are the finger rest and the ease at which it will turn. The former is most important as the latter can generally be made acceptable with a tiny drop of oil. However, if the height of the rest is incorrect for you then you will find using the knife either becoming rapidly tiresome and a strain, or you will be unable to exert enough pressure with enough control to make a reasonable cut.
There are no magic formulae for how high the rest should be in comparison to your hand size, it’s a purely personal thing that you will only really be able to judge through use. Therefore it can be wise to invest in one with an adjustable rest and simply fiddle with it until it’s comfortable. If you are lucky enough to have one included within a starter kit that is at the correct height for you, but is an uncomfortable shape then try covering it. Anything from a piece of foam and gaffa tape, to a couple of plasters, if it works for you, it’s all good.
The blades for swivel knives however are an excellent example of where more expensive can often prove to be a wise investment. In most starter kits the blade included is somewhat broad, chunky and it is simply physically impossible to create a fine and intricate cut with it, no matter how good you are. Investing in a good quality fine blade will enhance your initial cuts, and therefore the resulting work.
Metal
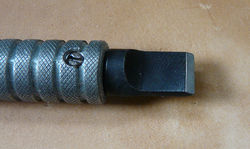
There are a number of precision ground metal blades available that suit most, if not all, situations; from broad flat blades to angled blades for finer detailed work. One thing they all share in common is that they will need to be kept in good condition, regularly stropped and honed to continue providing you with a clean cut.
Ceramic
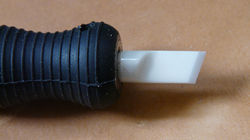
Relatively expensive, ceramic blades are generally found in almost as wide a range as metal ones. Their main advantage is that they keep a keen edge, do not need to be honed, and barely need to be stropped either. Their disadvantage is in the fact that they are somewhat brittle and so are far more likely to chip or break if knocked against something hard or dropped. When I first started tooling, I bought my first ceramic blade on the second day, and then I dropped it five years later and had to buy another one; I’ve used that almost exclusively now for well over a decade! I’ve never needed to sharpen it, and probably even only strop it once a year, if I remember!
Blade shape
If you are unlikely to be carving or tooling fine, intricate shapes or very small or tight curves then a straight blade will most likely suffice. They do require the swivel knife to be held at a greater angle (rather than almost perpendicular for angled ones) so as to cut with the corner of the blade and this is generally what makes tight curves somewhat more difficult to achieve cleanly.
Often they are also slightly thicker and are therefore capable of giving a wider cut. This gives them slightly more versatility when it comes to carving accents.
Angled blades taper to a point that enables far more intricate and fine cuts to be made. If you are considering complex knot-work, small designs, tight curves or even more pictorial carving then this is probably a more versatile blade to invest in.
Though this is a somewhat specialised blade, the ability for it to provide consistent, even parallel cuts can be an incredible time saver, especially for very fine knot-work or flora, leaf stems etc.
Mallets
Well, technically there are hammers, mallets and mauls, though generally it isn’t advisable to use a metal hammer when tooling leather for two reasons. Firstly and most importantly, they give a very sharp strike and therefore it is more difficult to gauge the feedback from the leather. Secondly, the tools are generally made from softer alloys than metal hammers and so will deform if used with them, though this in itself isn’t necessarily much of an issue.
The difference between a mallet and a maul is basically in the shape of the head. A mallet will give you a flat striking surface and a maul has a curved one. Mauls are also generally found in heavier weights than mallets. There is no real right or wrong time to use one of the other, though you can get a greater range of strikes (by using the curve to deflect some of the force) from a maul that you can from a mallet. However, their use can be something of an acquired skill and to be honest it’s not one I’ve even felt that comfortable with so I only use a mallet. As with so much of leatherworking, it’s personal preference so if possible, try before you buy.
Wooden
Most of the starter kits you can buy will come with a simple wooden mallet. There is nothing wrong with this and if you prefer a lighter weight you may find you want to stick with it for tooling purposes. However, they are not very durable (the surface of the head can easily become damaged, so it is recommended you get an alternative for setting and any embossing, both of which are likely to require firmer strikes.
Rawhide
Usually relatively heavy, rawhide mallets can be a good alternative to wooden ones and are also more durable. The face will degrade over time but can take a lot more punishment that a wooden mallet. They can give quite a sharp strike with a fair bit of bounce to it that can be harder to control, but this does soften as the head becomes more worn in.
Nylon or Polymer
This is where the greatest range can be found. From relatively cheap, medium weight mallets to top of the range, weighted and balanced mallets and mauls. The heads themselves can be found in differing densities, and therefore give differing levels of bounce and feedback; generally the harder they are the more durable but also the more bounce-back you get.
The main advantage I’ve found with poly-headed mallets is that even as the head is damaged with use, the feedback you receive from each strike remains fairly constant. Due to this I’m still using the same mallet that I bought over fifteen years ago and it still feels the same to work with as it did back then (or at the very least it has changed so imperceptibly over the years that I’ve grown used to it).
Beveller
Of the three most basic tooling skills of bevelling, backgrounding and shading, bevelling is probably the most used of all. Additionally good bevelling can really lift the quality of a piece of work so it is a skill worth taking the time to practice with.
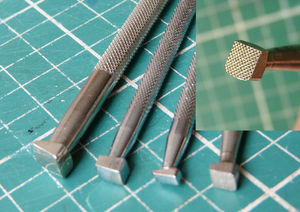
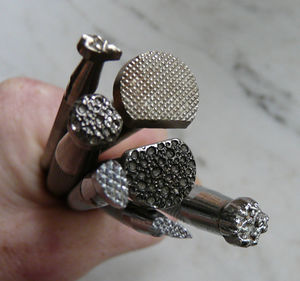
Like many ‘tooling’ tools bevellers come in a number of variations, both in size and those with a smooth or textured face and each has a very slightly different way of being used. Generally the smaller the tool the easier it can be driven into the leather and so will possibly need a lighter strike, the broader the tool, the harder the strike.
Most basic sets will contain a medium sized beveller, though if it is one with a textured face I would recommend getting a smooth faced one too as it is such as essential and versatile tool. Additionally once you’ve mastered a smooth beveller then the transition to a textured one is easier than the other way round.
Where to Use
The simple answer to this is almost everywhere! Creating borders, lifting a design or ‘raising’ a section, as a prelude to background shading, creating the illusion of an overlap (essential when tooling knot-work), all are achieved with bevelling.
The general rule of thumb is to bevel on the outside of a design, or on the side of a line where you would wish a ‘shadow’ to form. The more artistic the design, the more difficult it can be to judge which side to bevel on, but both practice and/or frequent checking back to reference material will help.
If you wish to background shade an area, it can be useful to bevel on that side of the line as it will provide you with a cleaner edge.
Backgrounder
Like bevellers, backgrounders come in a variety of sizes and a wide range of textures. The most basic and oft used is a simple cross-hatched, diamond texture, but you can get some quite random ones; even a pebble effect. Regardless of the face, the manner in which they are used is the same, with the same prevision as bevellers regarding surface size in relation to strike strength.
Where to Use
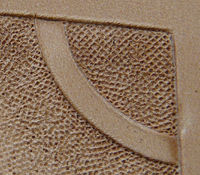
Generally the point of these tools is to evenly reduce the overall surface area of a section, thereby effectively ‘lifting’ the remainder of the design. Most commonly they are used evenly within small enclosed sections of a design, for example within the lines of Celtic knot-work. However, they can be used on the edge of a design, gradually fading out by using lighter and lighter strikes, to blend in with the smooth leather surface.
Pear Shader
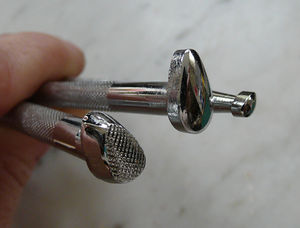
Yet again, like bevellers, pear shaders are available in a variety of sizes and with either a smooth or textured face. For the same reason as the beveller this is another tool I would recommend getting in a smooth face as well if your initial kit only contains a textured one. The smooth face will allow for a good glide over the leather whereas a textured one will require a certain amount of hovering.
Where to Use
This is a very versatile tool that can quickly and easily give a real tactile lift to a piece. On plain VegTan which bruises (shows a darker colour) under impact this tool can literally shade your work. Though this effect is lost with most dyeing techniques the impressions they make, smooth depressions and channels, can make a piece just beg to have you run your fingers over it.
Often used on American western saddles and tack to give a sense of curvature to floral carving, it can do similar and lends itself very well to heraldic designs and scroll work.
